Changing Day into Night
Source: http://jollyjack.deviantart.com/art/Easily-amused-136005785
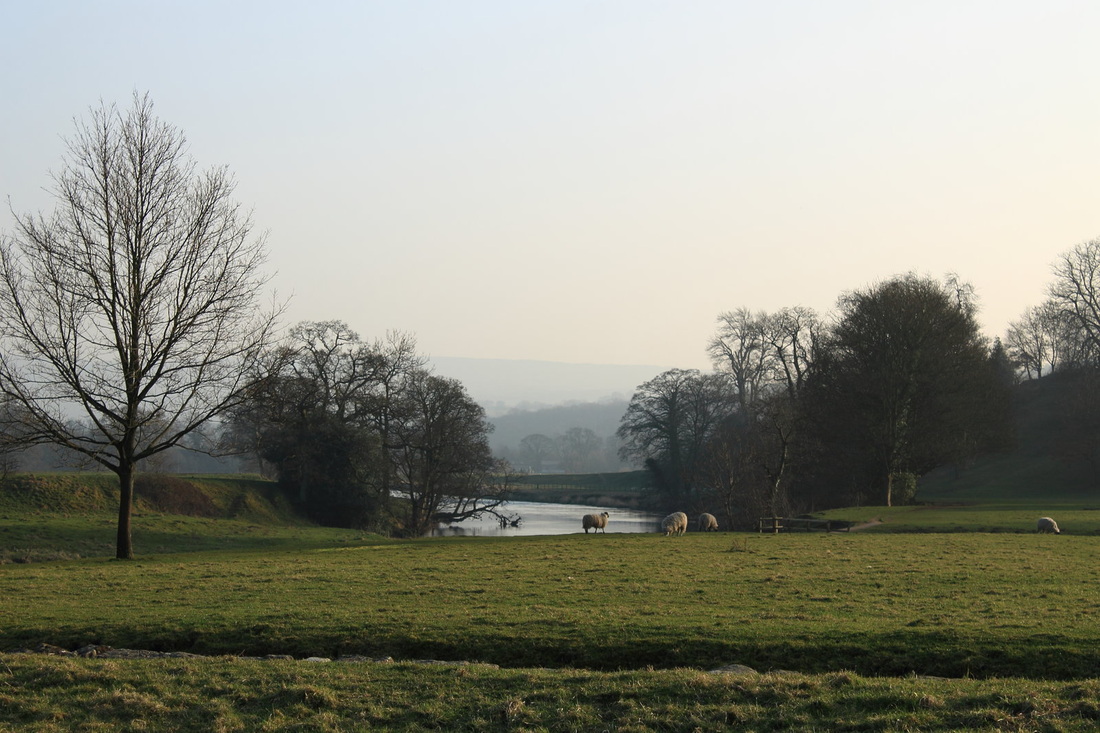
There are many ways to turn a daytime picture into a night one, depending on the tutorial and strategies that you use. The common theme among them is to add a blue value to the photo and make it darker. Effects such as light in the windows, street lights, or the moon can be added.
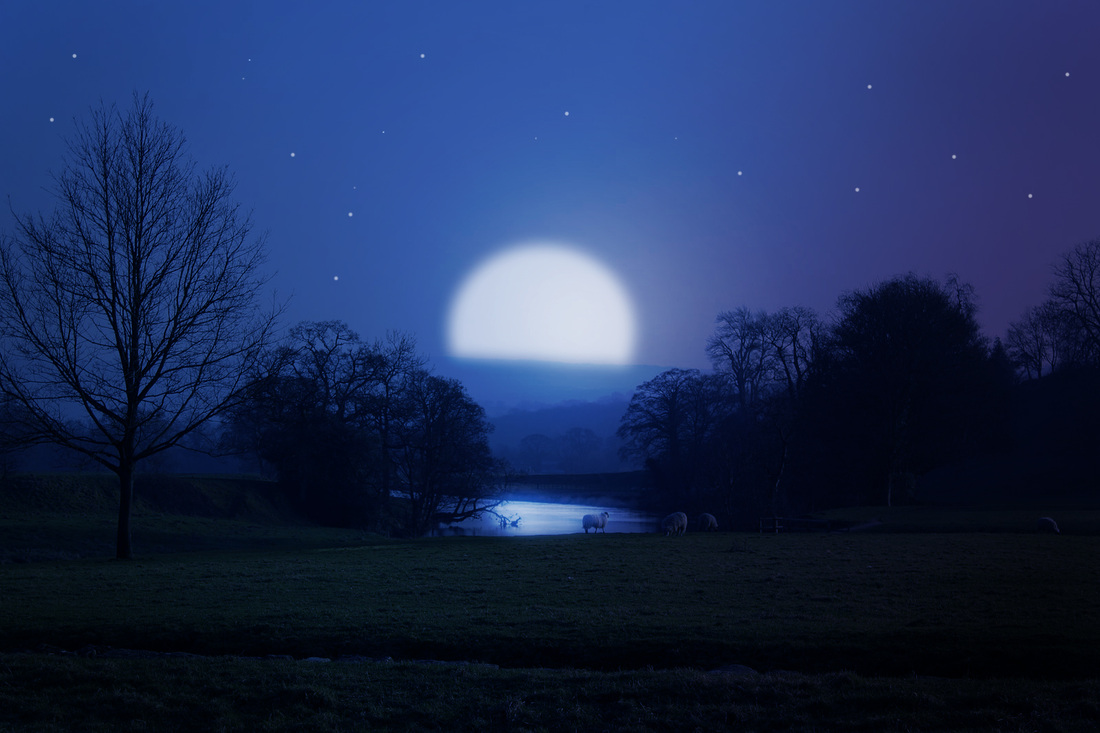
Depending on the picture, a day to night transformation can be tricky. If a landscape photo has too many clouds in the sky or if is very obviously sunny, then it is hard to hide these details when turning it into a night time picture. However, I have found that adding a blue wash/tone over the picture and adding in night time details (such as a moon and stars) makes the final picture more effective.
When there are people in the picture, it also makes it more difficult to change from day to night because the lighting on them would look different in daylight versus night light.

Source: http://blog.entheosweb.com/tutorials/learn-how-to-create-a-night-effect-in-photoshop
|
Source: http://www.photoshopelementsuser.com/html/changing-day-to-night/
|
Day to Night Tutorial
|
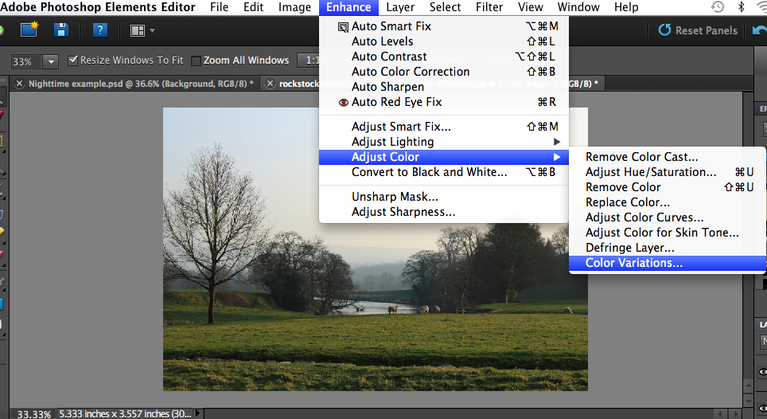
1) Open up your picture in your work space. Command + J to duplicate the layer so that we can go back and view the changes to original. 2) To add a blue tone to the picture, go to Enhance > Adjust Colour > Colour Variations |
|
|
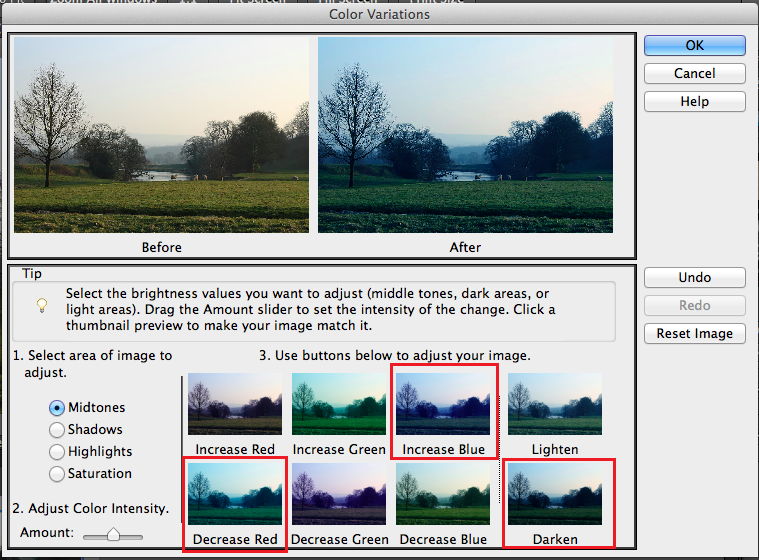
3) A box will open up. I selected Decrease Red, Increase Blue, and Darken. The preview pane will give you an idea of what the picture will look like with the changes. |
|
|
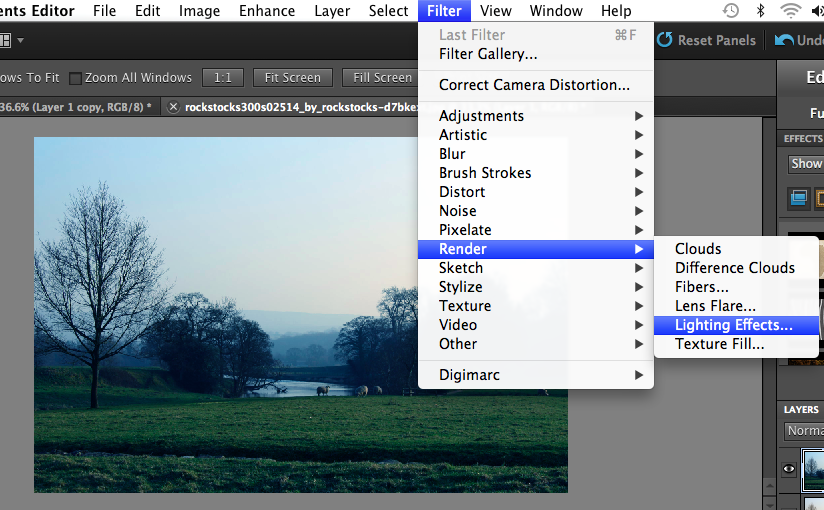
4) Next, it's time to play with the lighting of the photo. I have decided that I want to add a moon to my photo. It will go in the middle, just between the two trees. That will be my source of light in the picture. To access your lighting options, go to Filter > Render > Lighting Effects |
|
|
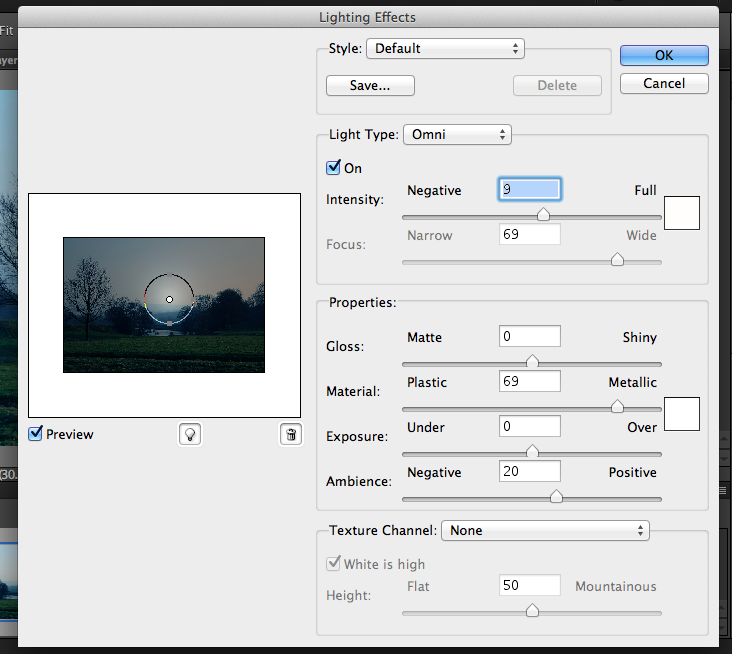
5) Make sure your lighting type is switched to Omni. I placed the light source in the area that I will be placing the moon after. The light should start at the centre of the picture and get darker around the edges of it. You can make the light source area bigger or smaller, and modify the intensity of the lighting by moving the sliders under Intensity and Ambience. |
|
|
6) Once the lighting has been applied, take the Burn and Dodge tool to lighten up specific spots of the picture. Burn will darken the area. Dodge will lighten it. You can modify the Exposure amount and Brush Size with the sliders under the menu bar. For this, I recommend using a larger brush with the intensity set between 10-20. Make quick sweeps with the Burn tool around the edge of the photo to darken the edges even more. Use Lighten around the light source. |

|
|
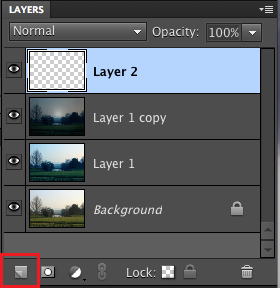
7) Click the bottom left button of the Layers menu to create a blank, new layer. We will be building our moon on this layer. |
|
|
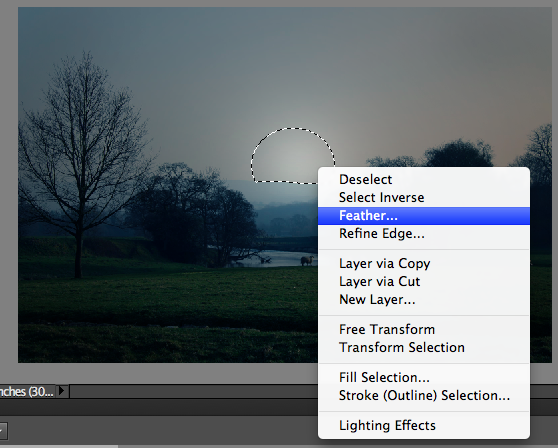
8) Take your Round Marquee tool and draw a circle where you want your moon to go. We want it just peeking over that horizon. Next, take your Magnetic Lasso tool, click on Subtract from Selection under the menu bar, and select the horizon. The magnetic line should adhere to the edge of the horizon, Cut out the area where the moon should hidden. 9) Right click on the selected area and click Feather. |
|
|
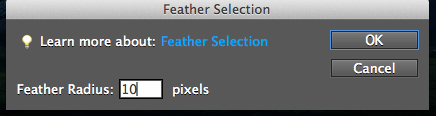
10) We want to give the moon a soft glow so we are going to have a fairly large feather radius. I put in 10 pixels as my value.
|
|
|
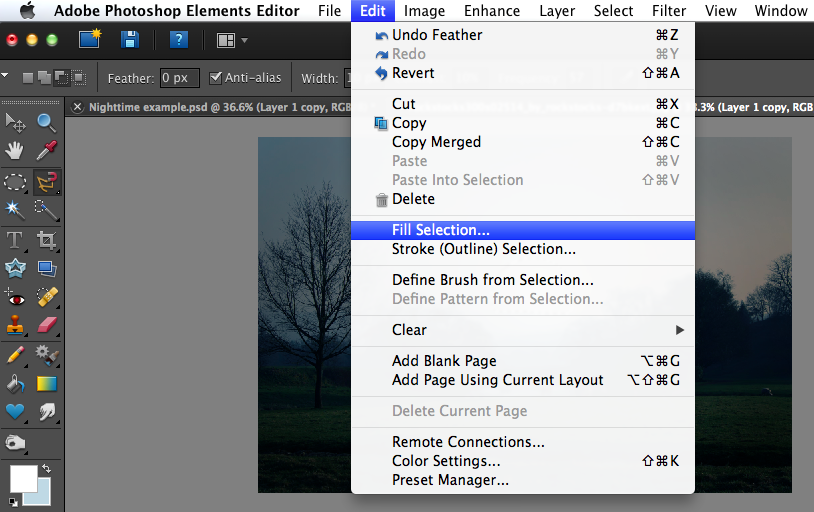
11) Make sure that your colour palette in the foreground is white. Edit > Fill Selection Ensure that the option says fill with foreground and press OK. Your moon area should now be filled it. |
|
|
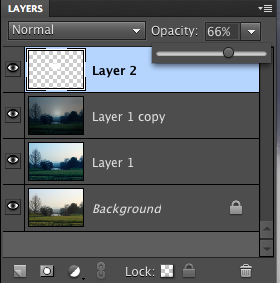
12) You can decrease the brightness of the moon by modifying the Opacity of the layer in your Layers menu. I've set mine to 66% of the layer can be visible, |
|
|
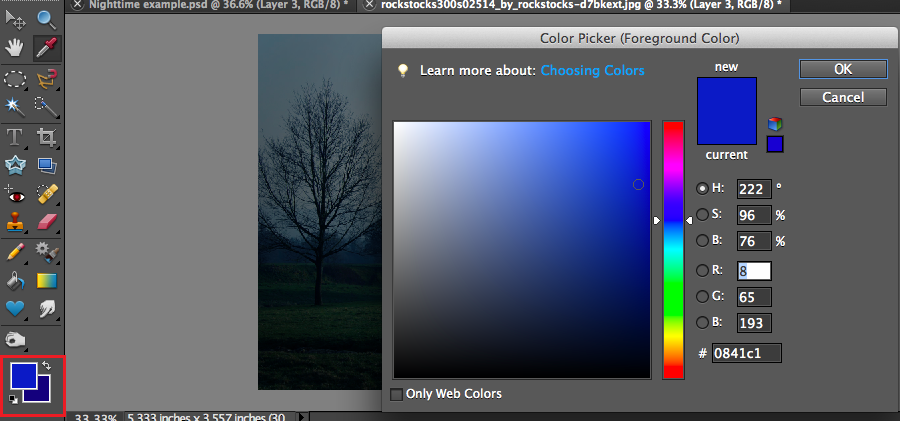
13) To give it an even more blue-ish tone, we're going to apply a gradient over it.
Click on each of your colour palettes to open the colour picker and choose a darker shade of blue. |
|
|
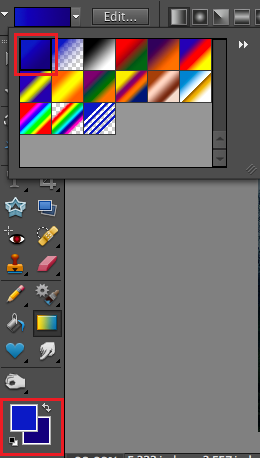
14) Select your Gradient tool on the left side menu. Select the first blue blend option that is available |
|
|
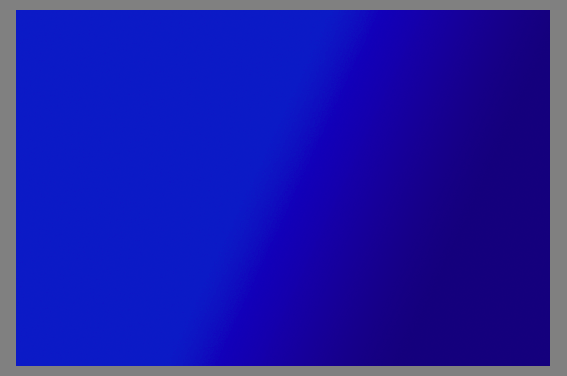
15) Command + J to create a new layer that will be our gradient layer. Click and drag your mouse so that the gradient covers the whole picture. |
|
|
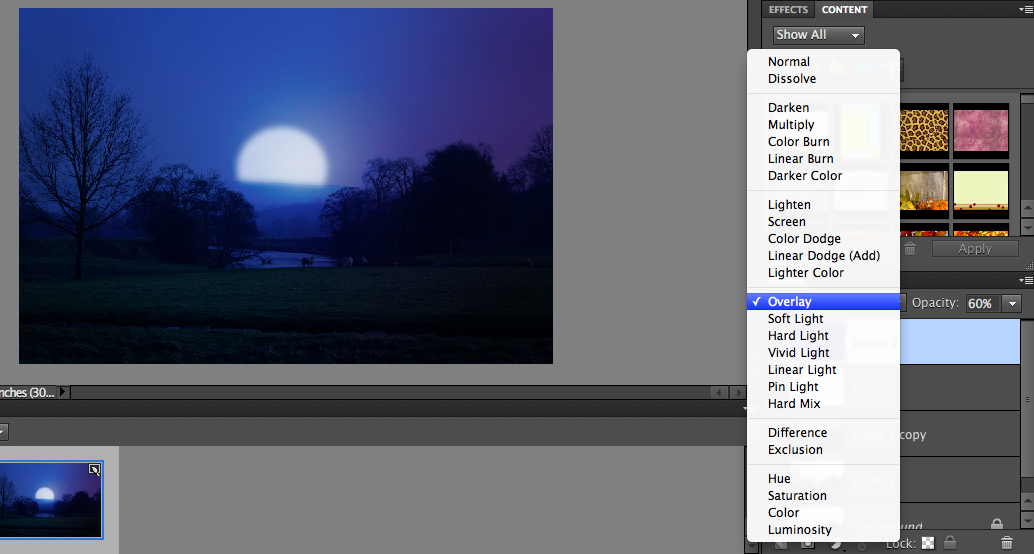
16) Change the blending option of the gradient layer in the Layers tool bar.
I changed it Overlay and then changed the Opacity to 60%. 17) You may continue to use your Burn and Dodge tool to add more detail to the picture. For example, I took my Dodge and created a reflection of the moon in the lake. I also took my Brush tool, set the size to 5 and 9, and added stars to the night sky. |
|
|
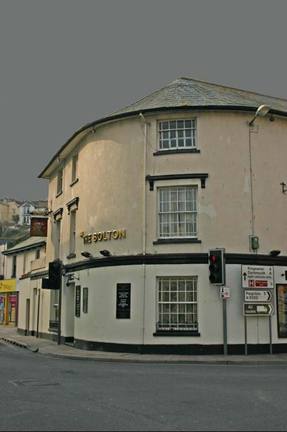
Original
|
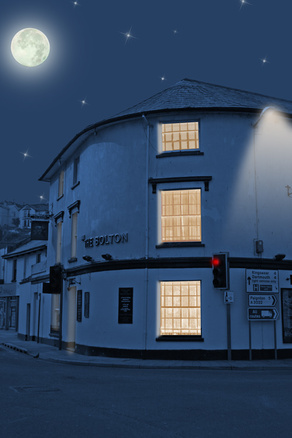
After
|
