Create a Duplicate Layer
Once you have opened up your image, make sure that you create a duplicate layer of your background image. To do this, press Command + J. This way, you have an original image to go back to and compare the changes that you have made.
Selection Short Cuts and Feathering
Deselect the area: Command + D.
Select the inverse: Command + I.
Duplicate layer: Command +J
Feathering is a way to blend your selections and not make the edges as harsh or sharp. When you are making colour changes to only a certain portion of your photo, I recommend feathering your selection first so that it it blends better.
To feather, make your selection of the area > right click > feather. A box will appear asking you how much to feather the selection. The higher the number, the softer the edge.
After you have feathered, you can either turn it into a new layer (by pressing Command +J) or editing the selection within the same layer.

Unfeathered
|
Feathered
|
Quick Editing Mode
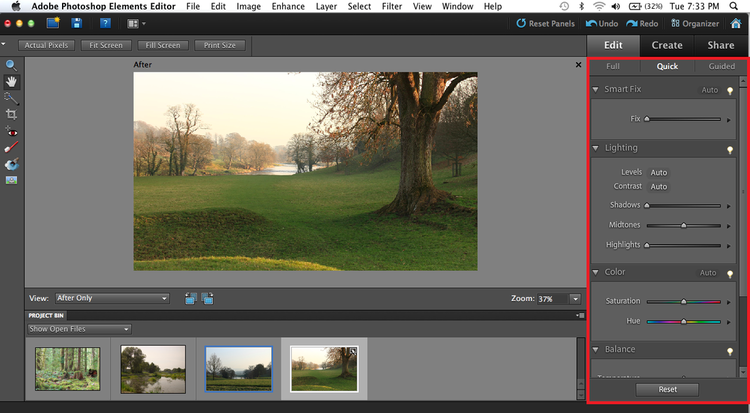
The quick editing menu can be accessed by clicking Quick underneath of the Edit menu on the right side of the screen. Here it will show sliders that will alter or colour your image, depending on what you're looking for.
Options such as SmartFix will automatically highlight and change what it thinks will make the image look better. This is good for quick fixes, but for more detailed or subtle changes, try playing around with the other sliders to see the difference between your first and later images.
The lighting affects how light or dark certain areas of the picture is.
Hue and saturation affect the overall colour of the image.
If you wish to isolate and change the lighting/colour only of a portion of the picture, you may select the area using one of the tools from the left-hand tool bar. Some of these tools include your circle/rectangle marquee, lasso, or magic wand.
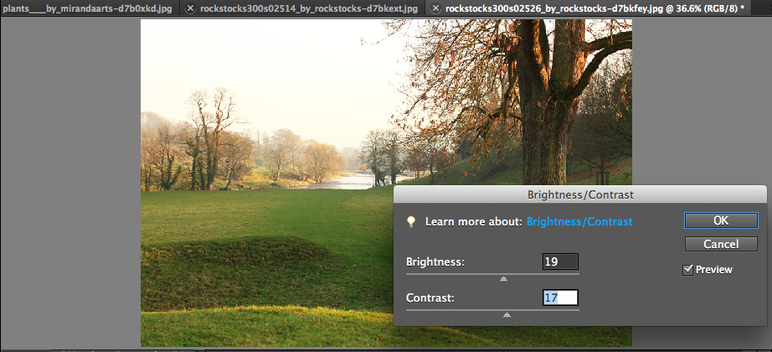
Brightness and Contrast
For a quick and easy way to make your picture look less dull, go to Enhance (on the top menu) > Adjust Lighting >Brightness/Contrast.
You can brighten or darken your picture by adjusting the slider. Contrast can also be improved by moving the slider to the right. However, be careful that you don't over-contrast the photo, or else the colours become too sharp.
You can brighten or darken your picture by adjusting the slider. Contrast can also be improved by moving the slider to the right. However, be careful that you don't over-contrast the photo, or else the colours become too sharp.
Adjust Colour Curves
Open the start image in Elements, and go to Enhance > Adjust Colour > Adjust Colour Curves.
The preview window on the right will show you how the picture will look after you've modified the colours by dragging the sliders. Depending on the image and what you wish to do with the picture,
For more precise adjustments you can use the Highlights, Midtone Brightness, Contrast and Shadows sliders: in this case, drag all the sliders a little way to the right to boost the colours and contrast.

Colour Variations
Enhance > Adjust Colour > Colour Variations
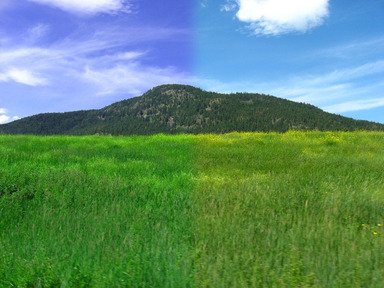
Colour variations add colour and hue to your current picture. You can add different colours and combinations by clicking on more than one colour. You can also change the areas of adjustments to suit your purposes.
Don't worry if it looks too coloured over. This can be fixed by decreasing the opacity or blending option of the layer afterwards.

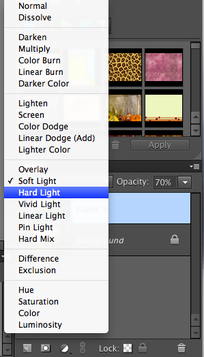
Layer Blending Options and Opacity
To blend your top layer into the layer below it, you can change the the options on the Layer pane (in your bottom left of the window). You can lighten or darken the overall effect by choosing one of the many options.
You can also decrease the Opacity of it to make your top layer either less or more apparent.
You can also decrease the Opacity of it to make your top layer either less or more apparent.
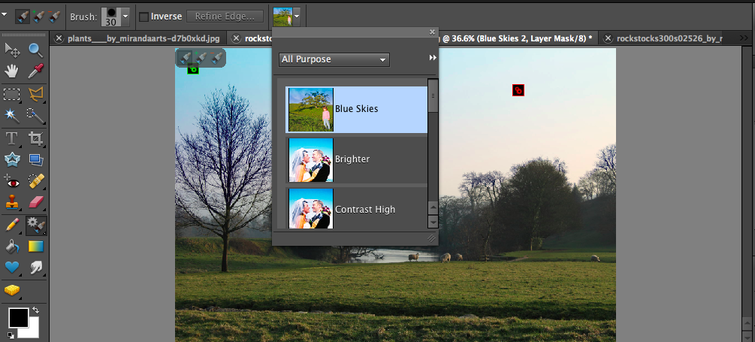
Smart Brush
The smart brush tool will automatically change a selected area for you. All you have to do is click and drag to select the area that you want to change. The Blue Skies option will automatically put in a blue gradient that overlays your sky. Click and drag to select the area of the sky you wish to enhance.